Showing posts with label Textures. Show all posts

Tuesday, 8 December 2009

Curtain texture effect

In this Photoshop tutorial you will learn how to create a curtain texture effect using the gradient tool. The process only requires three steps and is very quick to create. I have chosen a blue colour for my curtains, but you can use whatever colour you wish.


Curtain texture effect

Step 1

Open a new Photoshop document with the size 640 x 480. Then reset the colour palette by selecting the ‘D’ key. Select the gradient tool with linear gradient and the mode at difference.


Step 2

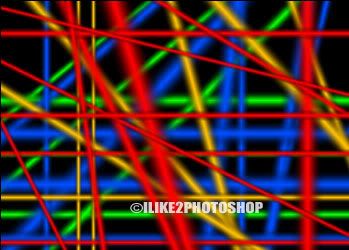
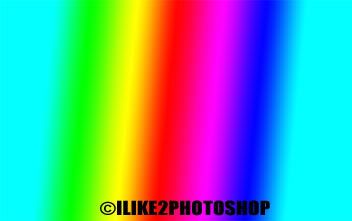
Hold down the Shift key and click and drag small horizontal distances from the left of the canvas. You will be left with something like below:
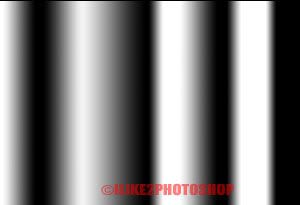


Step 3

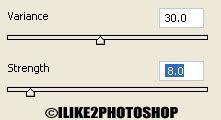
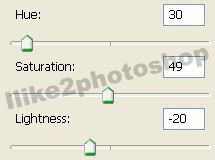
Select Image > Adjustment > Hue/Saturation and change the sliders to your liking, make sure you select the colourize checkbox. I have given the following settings: Hue = 225, Saturation = 53 and Lightness = -27.


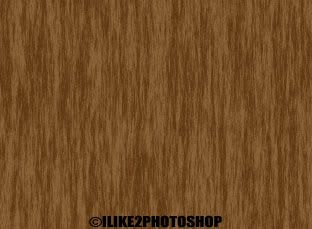
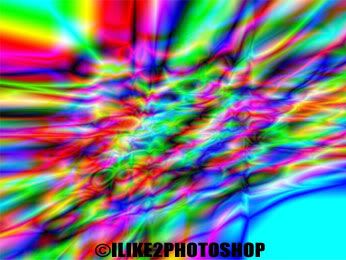
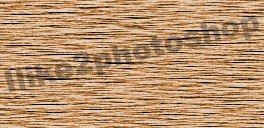
You should now have a curtain texture effect.

Wednesday, 28 October 2009

Abstract line texture

In this tutorial you will learn how to create an abstract line texture using the gradient tool. The results of this texture will give a random selection of lines. This effect is created in a similar way to the kaleidoscope texture effect.

Abstract line texture

Step 1

Open a new Photoshop document with the size 800 x 600 dimensions. Then select the paint bucket tool and fill the canvas in a black colour.


Step 2

Select the gradient tool with the reflected gradient and the mode at normal and a foreground to transparent gradient as shown below.


Step 3

Click and drag small gradients on the black canvas to created horizontal and vertical lines as shown below. Create the gradients in random positions all over the canvas.


Step 4

Now keep changing the colour of the gradient, but make sure you use the foreground to transparent gradient and you should get an effect like below. You can use as many or as few colours as you wish.


You should now have an abstract line texture.

Tuesday, 28 July 2009

Create Honeycomb texture

In this tutorial you will learn how to create a honeycomb texture. The honeycomb texture looks like a bee’s structure for holding wax. This tutorial requires using various filters and the gradient tool.

Honeycomb texture effect

Step 1

Open a new Photoshop document with the size 640 x 480 dimensions.
Set the foreground colour to #000000 and the background colour to #ecea26 as shown below:


Step 2

Select the gradient tool with the Radial gradient and the foreground to background gradient and drag a pattern on the canvas like below:


Step 3

Select Filter > Texture > Stained Glass and add the following settings and click ok:

  • Cell Size = 100
  • Border Thickness = 4
  • Light Intensity = 3

Step 4

Select Filter > Artistic > Poster Edge and add the following setting then click ok.
  • Edge Thickness = 1
  • Edge Intensity = 1
  • Poterization = 5


You should now have a honeycomb texture.

Sunday, 21 June 2009

Wood texture effect 2

This is another method for creating a wood texture effect in Photoshop. This time only the fibers filter is needed for this wood effect.

Wood texture effect 2

Step 1

Open a new Photoshop document with 640 x 480 dimensions.
Choose a light brown colour for the foreground colour and a dark brown colour for the background colour. I have used #8a6338 for the foreground and #5f3912 the background colour, but you can use whatever colours you wish.


Step 2

Select Filter > Render > Fibers and add the following settings below:


I have selected 30 for the variance and 8 for the strength.


Step 3 – optional

If you don’t like the colour of your wood texture, you can select Image > Adjustments > Hue/Saturation. Then adjust the saturation texture to your liking.


You should now have wood texture.

Sunday, 7 June 2009

Abstract water texture

This Photoshop tutorial will teach you how to create an Abstract water texture. The result gives the effect similar to water. You are required to use the cloud filter and various other filters for this tutorial.

Abstract water texture


Step 1

Open a new Photoshop document with the size 800 x 600.
Reset the colour palette by pressing the “D” key.
Select Filter > Render > Clouds and your image should look like below:


Now select Filter > Render > Difference clouds.


Step 2

Select Filter > Sketch > Chrome. I have set the detail to 7 and the smoothness to 4, but you can experiment with your image.


Step 3

You now need to add colour to the texture. Select Image > Adjustment > Colour balance and add the following settings. I have set the colour levels to -3, +47 and +100 and set the tone balance to Midtones.


Step 4

Duplicate the layer by selecting Ctrl + J and change the blending option to “Multiply”. You can experiment with the other blending options if you wish.


Step 5

Your texture effect might look a little dark. Select Image > Adjustment > Brightness/Contrast change the brightness to 44 and the contrast to 37 and click ok.


You should now have an abstract water texture.

Monday, 25 May 2009

Kaleidoscope texture effect

This Photoshop tutorial will teach you how to create a Kaleidoscope texture effect. The results will give random patterns of colour which resemble a kaleidoscope. This tutorial only requires three steps.

Kaleidoscope texture effect


Step 1

Open a Photoshop document with the 800 x 600 dimensions with a white background.


Step 2

Select the gradient tool with the spectrum gradient and the mode Difference.


Now click and drag the gradient tool anywhere on the canvas using the left mouse button. Your canvas should look like below:


Step 3

Now choose another location on the stage and keep making random gradients. You can make as many random gradients as you wish. Try to vary the direction and lengths of each gradient. You should notice a colour pattern appearing like below:


You should now have Kaleidoscope texture effect.

Friday, 8 May 2009

Electric texture effect

This Photoshop tutorial will teach you how to create an electric texture effect. This gives the effect of electric waves in the texture. This tutorial uses cloud filters to create the electric texture effect.

Electric texture effect


Step 1

Open a new Photoshop document with the 450 x 350 size.
Reset the palette to black and white by selecting the “D” key.


Step 2

Select Filter > Render > Clouds and then select Filter > Render > Different Clouds. You should get the following image:

Photobucket

Now select Image > Adjustment > Invert. You should get the following image:

Photobucket


Step 3

Select Image > Adjustment > Curves (Ctrl + M). I set the following curve, but can experiment with your image, then click ok.

Photobucket


Step 4

Now select Image > Adjustment > Colour balance and adjust the colour to what whatever you want using the sliders. Make sure you have the Midtones and the Preserve Luminosity selected.

Photobucket

You should now have an electric texture effect.

Thursday, 2 October 2008

Brick texture effect

This Photoshop tutorial will teach you how to create a brick texture effect. This effect is quick and simply and only requires two steps.

Brick texture effect

Step 1


Open a new Photoshop document with the 640 x 480 size. And set the foreground colour to a nice brick colour. I used # 97412e, but you can use whatever colour you wish. Now using the paint bucket tool fill your canvas with your chosen colour, like below:


Step 2

Select Filter > Texture > Texturizer and then add the following setting below: Texture = Brick, Scaling = 200%, Relief at 20%, and Light at top right you may experiment with the various settings if you wish.


**For the light setting you can also use: bottom left, top left and bottom right.


You should now have a brick texture effect.

Tuesday, 5 August 2008

Wood texture effect

This Photoshop tutorial will teach you how to create a wood texture effect. Only three filters are needed for this effect. This tutorial is very simple and creates a nice effect.

Wood texture effect

Step 1

Create a new document with 640 x 480 dimensions.
Select Filter > Noise > Add Noise and use the following settings:


**Make sure Monochromatic is checked.

Step 2

Now select Filter > Blur > Motion Blur and set the angle to 0 degrees and the distance to 20 Pixels and click ok. This motion blur creates the wood grains.

Step 3

Select Filter > Sharpen > Unsharp Mask. I used the following settings 300% for the amount, 2.5 pixels for the radius and 0 levels for the threshold, but you can experiment with the various settings.


Step 4

Select Image > Adjustment > Hue/Saturation and add the following settings. You can again experiment with the various settings. Make sure colourize is checked.


You should now have a wooden texture effect.

  COPYRIGHT © 2010 · ILIKE2PHOTOSHOP · Theme by Ourblogtemplates

Back to TOP