Black eye effect in Photoshop
This Photoshop tutorial will teach you how to create a black eye effect. This will give the effect of someone being punched in the eye. This is effect is fairly simple and can create some interesting and fun results. This tutorial uses quick mask. I have used a free stock image of eyes which is available at: www.sxc.hu.
Black eye effect
Step 1
Open an image in Photoshop which you wish to add a black eye effect to.
Step 2
Select the lasso tool and make a selection around the eye like below: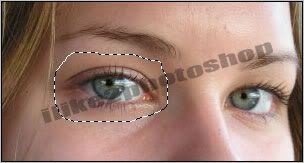
Step 3
Select the paint brush tool with an appropriate brush size and hit the Q key to enter quick mask mode. And then paint the eye like below: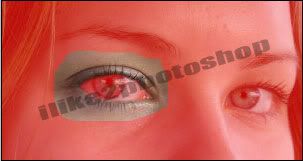
Hit the Q key again to exit quick mask mode and you should now have two selections around the eye.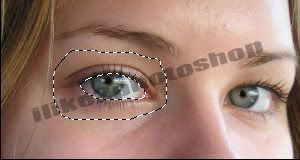
Step 4
Choose Select > Modify > Feather. Select 5 pixels and click ok. This softens the selection around the eye.
Step 5
Select Image > Adjustment > Hue/saturation. I used the following settings: hue at 0, saturation at -30, and lightness at -60. If you want a darker black eye you can decrease the lightness setting.
Step 6
Deselect the image by selecting Ctrl + D and then select Filter > Liquify. Now select the pucker tool from the toolbar on the left. Use the following settings: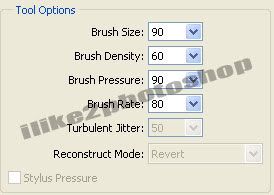
Now apply the pucker tool by clicking around the eye to give it a sunken effect. You should now have a black eye effect.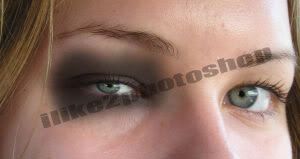
Related Tutorials
Vampire teeth


0 comments:
Post a Comment