Sunday, 27 September 2009

Change colour of an object

In this tutorial you will learn how to change the colour of an object in Photoshop using the Adjustment layer. There are many different methods of changing the colour, but I will show you the simplest way. I have used a free stock image which is available from www.sxc.hu


Change colour of an object

Step 1

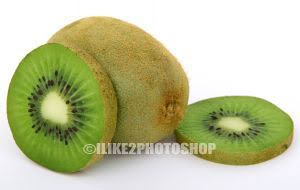
Open an image in Photoshop you wish to change the colour of. I have decided to change the colour of the apple in my image. You can use whatever kind of image you want, but make sure you use a coloured image.
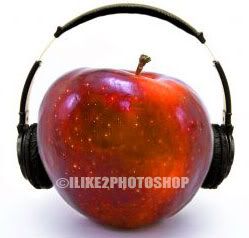


Step 2

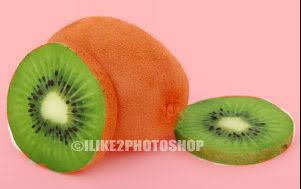
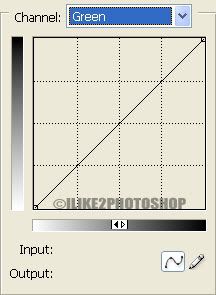
Create a new Adjustment layer by selecting Layer > New Adjustment layer > Hue/Saturation. Select the ‘Colorize’ box and then change the hue and saturation sliders to the colour you want to change, and click ok. I want to give the apple in my image, a green colour so have given the following settings below.
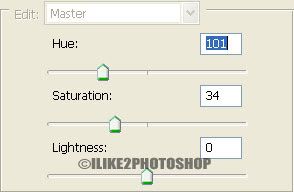


Step 3

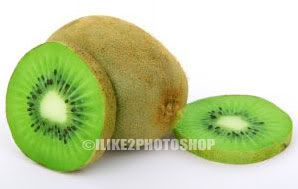
Add a vector mask by selecting Layer > Vector Mask > Reveal All. Then reset the colour palette by pressing the ‘D’ key and paint over all the areas where you don’t want the green colour. If you make a mistake you can flip over the colour palette (X) and paint over the incorrect area.


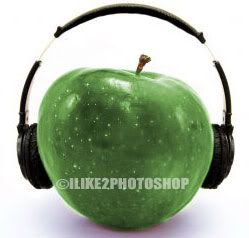
You should now be able to change the colour of an object.

Thursday, 17 September 2009

Vibrant Colours in Photoshop

In this Photoshop tutorial you will learn how to make colours more vibrant in your image. This process uses the quick mask mode and the curves adjustment tool. The curve adjustments make the colours in the image more vibrant by influencing the tones and contrasts of the colours. So, by adjusting the curves the specific points of the image can become more vibrant.


Vibrant Colours in Photoshop

Step 1


Open your image in Photoshop and duplicate the background layer by pressing Ctrl + J. I have used a free stock image of a sliced kiwi, but you can use whatever kind of image you wish.


Step 2

Reset the colour palette (D) then choose the brush tool with an appropriate brush size and enter Quick Mask mode (Q). Paint over the areas of the image where you don’t want the colour to be more vibrant as shown below. If you make a mistake you can flip the colour palette by pressing the ‘X’ key on the keyboard and painting over the area of your mistake.


Step 3

Exit out of the Quick Mask mode by pressing the Q key and you should get a selected image like below. If you are unhappy with the selection on your image you can re-enter Quick Mask mode and make adjustments.


Step 4

On the menu bar select Image > Adjustments > Curves and the curves adjustment window should appear. A colour image is made up red, green and blue channels (RGB). The Curve adjustment tool lets us work with the RGB channels as well as the individual colour channels. So, since my image contains green colour I will start with green channel. At the bottom of the Curves tools there is an input and output tone. Currently, the tone is unchanged as there is a diagonal line through the centre but if you drag the line towards the right side you will notice the input value increasing as well as the colours in the image getting brighter. While if you drag the slider to the left you will notice the output value increases and the image getting darker.


Step 5

Now simply play around with the curves until you are happy with colour. Once you are finish with the green channel move onto the red and blue channels. Deselect the selection Ctrl + D and you should now more vibrant colours. If you compare the original image with the image below you will notice the colours are less dull and more vibrant.

Thursday, 10 September 2009

Free Photoshop brushes

This article contains a list of places where you can get free brushes for Photoshop. There are many different kinds of brushes available to download which range from grunge brushes to garden plate brushes, and many more.

To install brushes, you simply place the ‘.abr’ file into the brushes directory in Photoshop. The default location for a window computer is: C:\Program Files\Adobe\ (Your PS version) \Presets\Brushes.

Below I have provided a collection of 6 different Photoshop brush websites.


Brusheezy
– The tag line is “stupid name, cool brushes”. There are many different categories of brushes to choose from.


Psbrushes – “The number one source for Photoshop brushes”. All the brushes are organized into categories with brushes being updated daily.


Deviantart – Many unique brushes submitted by the devianart community.


Qbrushes – The ‘Q’ stands for quality.


Brushking – Contains lost of different kinds of brushes.


Blendfu – Creative Photoshop brushes.


Feel free to leave any comments if you know any more free Photoshop brush websites.

Tuesday, 1 September 2009

Wood text effect

In this tutorial you will learn how to create a wood text effect in Photoshop. The wood effect is created by adding a pattern overlay on top of the text. You will need a wood texture for this tutorial. A list of free Photoshop texture can be found here.


Wood text effect

Step 1

Open a wooden texture in Photoshop.
Select Edit > Define Pattern then choose a name and click ok. This adds the texture to the library of patterns.


Step 2

Create a new Photoshop documents with the size 640 x 480. Select the text tool and type your message on the canvas like below. I have used impact font type, but you can use whatever font you wish. The wood text effect will work particularly well with chucky text.


Step 3

Select Layer > Layer Styles > Blending options. Check the pattern overlay checkbox then click the pattern drop down menu and select your wood texture.


Step 4

Now check the ‘Bevel and Emboss’ checkbox. Change the style to Outer bevel and the depth to 200% like below:


You should now have a wood text effect.

  COPYRIGHT © 2010 · ILIKE2PHOTOSHOP · Theme by Ourblogtemplates

Back to TOP