Burnt skin effect
In this Photoshop tutorial you will learn how to create a burnt skin effect. You will need a relevant texture for this effect. I have found at list of free textures which are available here. I have also used a free stock image of a man which is available from: www.sxc.hu. The process of creating the burnt skin requires using layer masks.
Burnt skin effect
Step 1
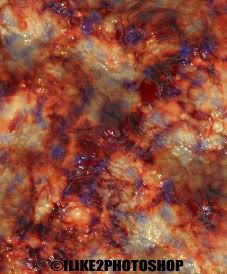
Open your images in Photoshop. I have used an image of man and for the burnt effect I have used a texture of flesh.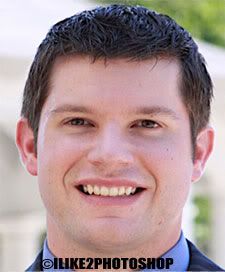
Step 2
Select your texture image Ctrl + A. Copy it by pressing Ctrl + C then paste it on your other image by pressing Ctrl + V. Alternatively, you can use the selection tool to drag the texture directly onto the other image.
Step 3
Choose Layer > Layer Mask > Hide All. You should notice the mask on your layers panel like below: 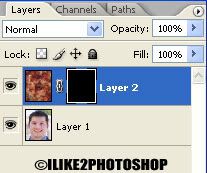
Step 4
Make sure you have white foreground colour selected.
Select a brush tool with an appropriate size and paint the areas of the face. Do not paint over the teeth or the eyes.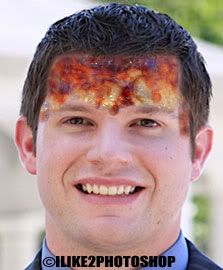
Step 5
To make the burnt effect look more realistic change the blending option to hard light and lower the opacity to 63%. You can experiment with the various blending options and opacity if you wish. 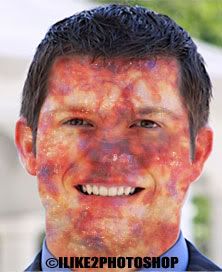
You should now have a burnt skin effect.


2 comments:
interesting post on creating the burnt effect in photoshop.
Thanks for info. I learned alot.
Post a Comment