Add snow to image
This Photoshop tutorial will teach you how to add snow to an image. This will give the effect of snow falling from the sky. This tutorial is similar to the rain effect. I have used a free stock image of a winter which is available at: www.sxc.hu
Add snow to image
Step 1
Open an image in Photoshop.
Step 2
Select Ctrl + Shift + N to insert a new layer. If a new layer window appears click ok. Now select D to reset the colour palette and choose the paint bucket tool and fill the new layer with the colour black.
Step 3
Select Filter > Sketch > Graphic pen and add the following settings: Stroke length at 5, light/dark balance at 95 and stroke direction at vertical.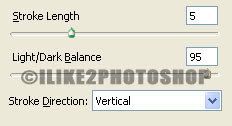
If you want more snow in your image decrease the stroke length. You image should now look like below. If you image does not look like below then you probably have not reset the colour palette.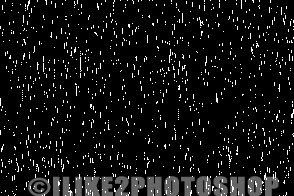
Step 4
Select Filter > Blur > Gaussian blur. I set the radius to 1pixel, but you can experiment to get the best effect.
Step 5
Now set the layer style to screen.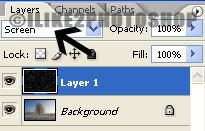
You should now have an image with snow.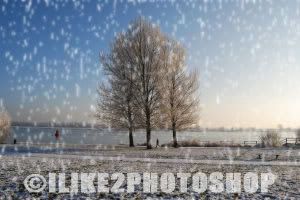


0 comments:
Post a Comment