Add facial hair
This Photoshop tutorial will teach you how to add facial hair to any photo. This effect is pretty realistic and can give some fun and interesting results.
For this tutorial I have used a free stock image of a lady which is available at:www.sxc.hu
Adding facial hair
Step 1
Open an image in Photoshop.
Using the eyedropper tool (I) select a sample of hair from the person in the photo. Then hold (alt) and select a different shade of hair.
Step 2
Select the brush tool and open the brush menu, add the following settings:
I have selected 9 pixels for the master diameter.
Step 3
Now open up the brush palette by selecting F5 and add the following settings for shape dynamics. The size jitter is at 100%, minimum diameter at 1%, angle jitter at 20%, roundness jitter at 15% and minimun roundness is at 20%.
Add the following settings for scattering. I have used 180 for the scatter, 4 for the count and 98% for the count jitter.
And finally add the following settings for colour dynamic. I have used 100% for the foreground/background jitter and 15& for the hue jitter.
Step 4
Now, this is the fun part, start painting over the appropriate areas. To achieve your desired effect you can adjust your paint brush size, adjust the paint colour, add layers and adjust the brush palette.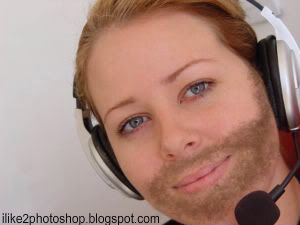
You should now have a nice image with facial hair.


2 comments:
Hey where did you get that brush? I can't find it anywhere so where'd you download it.
@EJ
The brush is one of the default Photoshop brushes.
Post a Comment