Spiky sphere
This Photoshop tutorial will teach you how to create a simple spiky sphere. You are required to use the extrude filter for this effect. The results of this tutorial look like a spiky/thorny ball.
Spiky sphere
Step 1
Open a new Photoshop document with 640 x 480 dimensions.
Take the paint bucket tool and fill the background colour black.
Select the elliptical marquee tool and drag a circle shape like below:
Step 2
Select any colour you wish and fill in your marquee with the paint bucket tool. I have selected #13b5ea colour. Now deselect the elliptical marquee Ctrl + D and your image should look like below:
Step 3
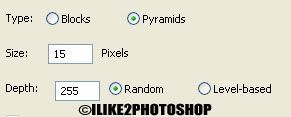
Select Filter > Stylize > Extrude and add the following settings:
- Type: Pyramids
- Size: 15 Pixels
- Depth: 255 Random
Step 4
To increase the size of the spikes choose Ctrl + F to repeat the effect. If you wish to change the colour of the Spiky sphere, select Image > Adjustment > Hue/Saturation and adjust the hue slider.
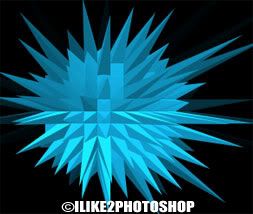
You should now have thorny ball effect.


1 comments:
Clear, easy to follow instructions. Thank you!
Post a Comment