Lined paper effect
In this tutorial you will learn how to create a lined paper effect in Photoshop using the pattern overlay presets. I have used the default Photoshop presets, but you can download custom presets from here if you wish.
Lined paper effect
Step 1
Open a new Photoshop document with the size 640 x 480 dimensions. Then select the Rectangle tool on the toolbar with the ‘shape layer’ options and drag a rectangle shape on the canvas like below. I have used a light grey colour foreground colour, but you can use a darker colour if you wish.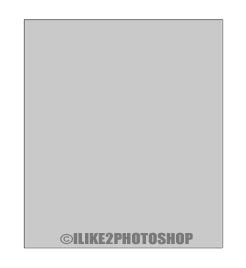
Step 2
On the menu bar select Layer > Layer Style > Blending Options then select the ‘Pattern Overlay’ checkbox. Now select the drop down menu from the pattern option, then select the menu option (black triangle) and choose the ‘Color paper’ option from the drop down menu as shown below.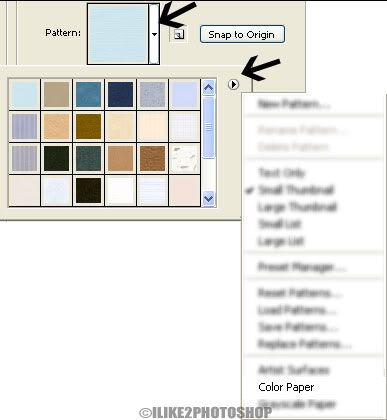
Step 3
Select the preset called ‘Notebook’ as shown below, and then click ok.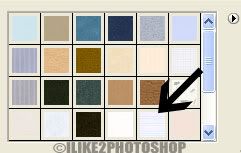
You should now have a lined paper effect.


0 comments:
Post a Comment